
Building Your Airport7 min read
Buildable area & levels
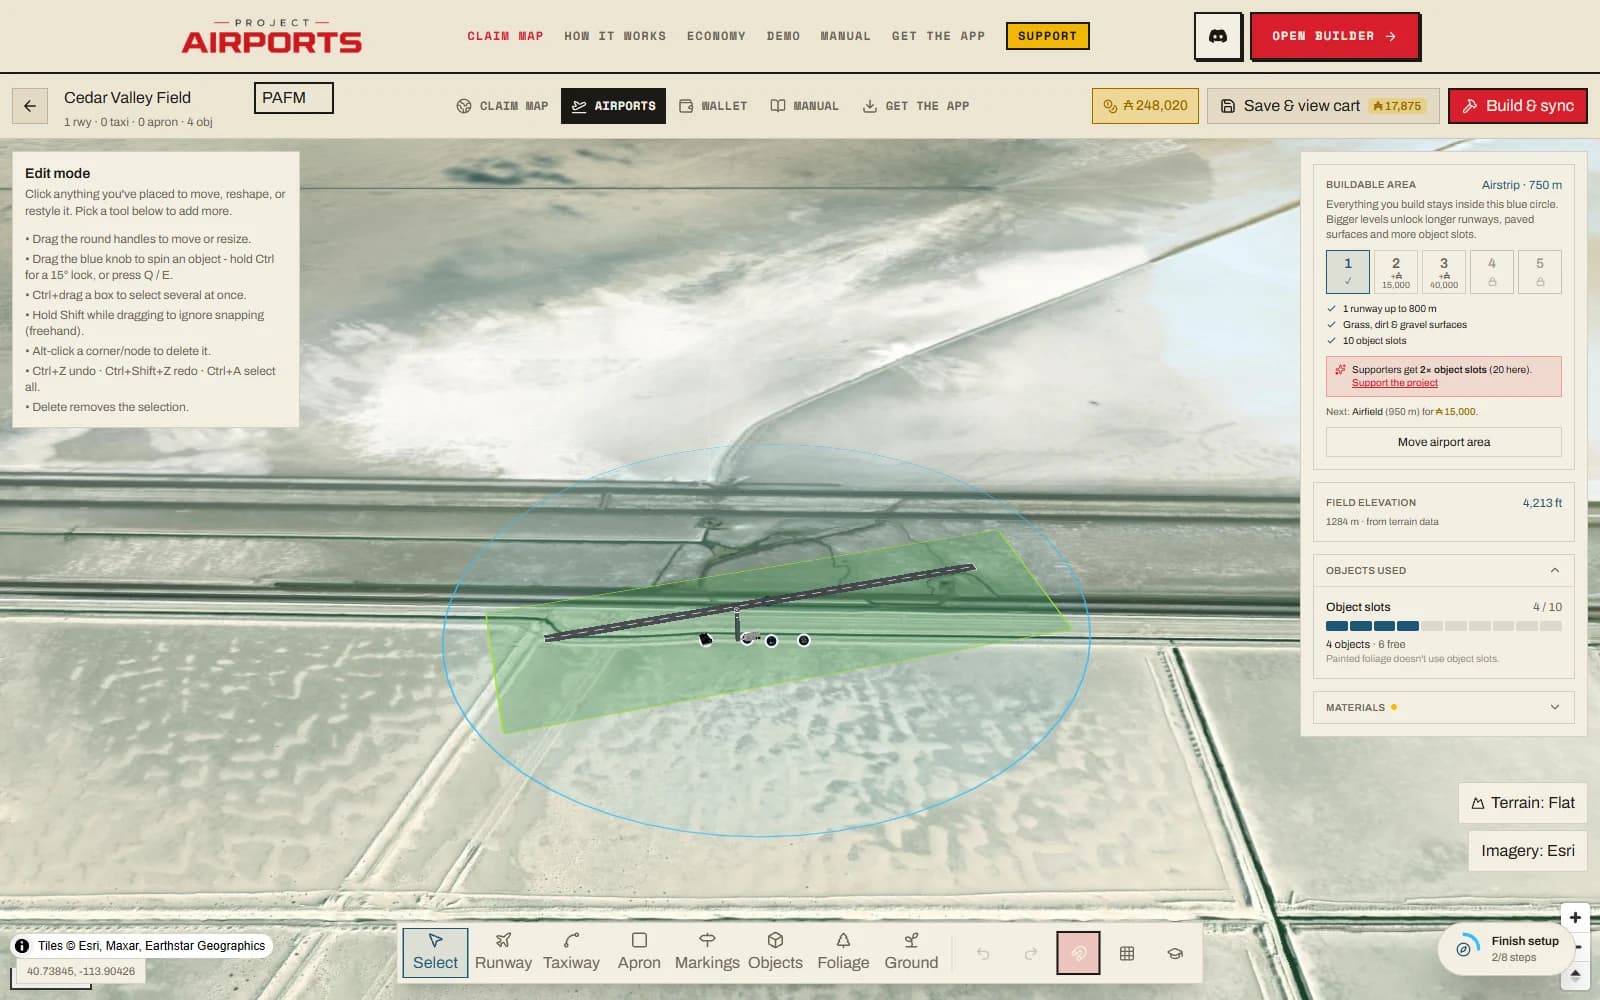
The buildable area is the blue shape everything must fit inside - runways, taxiways, aprons, objects, all of it. Its size is your airport's level, and growing it is how a dirt strip becomes a regional field.
The blue circle
To position it, click Move airport areaand then click the map to drop its center inside the claim this airport belongs to. The center can sit on the edge, so up to half of the circle's diameter can cross into adjoining land. Unowned overlap is cut off, and the area grows enough to return 20% of what was lost. The rest is the tradeoff for using edge territory.
Buy an edge-adjacent cell and its land joins this airport automatically, even when it is a separate claim. The shared line no longer cuts the overlapping part of the blue area, so runways, terrain and generated equipment can cross it. The area center still stays in the airport's original claim; holdings elsewhere do not join.
The five levels
| Level | Radius | Price | What you get |
|---|---|---|---|
| L1 Airstrip | 900 m | Free | 1 runway up to 800 m; grass, dirt & gravel included; 10 object slots |
| L2 Airfield | 1,350 m | Ⓐ15,000 | 2 runways up to 1,200 m; asphalt & tarmac included, no extra fee; 25 slots |
| L3 Regional | 1,850 m | Ⓐ40,000 | 2 runways up to 1,800 m; concrete included; wider runways, more aprons; 50 slots |
| L4 International | 2,250 m | Ⓐ70,000 | Coming soon (locked); 120 slots |
| L5 Sprawling | 2,500 m | Ⓐ100,000 | Coming soon (locked); 200 slots |
Prices are cumulative totals - upgrading pays only the difference.
Upgrading & permanence
The level card shows a green check on every level you own and a +costlabel on the ones above it - that's the difference you'd pay, since prices are cumulative. Owning L2 and moving to L3 costs Ⓐ25,000, not the full L3 price.
The rules, plainly
Purchased area is permanent- once bought, a level is yours for that airport. Shrinking the circle is free but never refunded, and you can't select a level below your paid size: those options show as already outgrown. Buy the room you need when you need it; there's no penalty for starting small. If you release the whole claim within 24 hours of buying it, the paid area upgrades return in full.
Elevation
The Terrain tool is the single place for terrain fit and elevation. Reference height is the height the sim will report for the airport, including any advanced height adjustment. It is surveyed from terrain data automatically, which is right for almost every field. Open Survey & exact height only when you need to measure in MSFS, change units, or enter a known datum. A missing centre sample can still resolve at build time. If a partial-level, natural-hole, or sculpted build cannot obtain the full terrain grid it needs, the build stops with a retryable terrain-data error instead of silently shipping different ground.
The three common choices stay visible: Follow ground,Smooth bumps, and Level pad. Exact leveling and whole-airport height adjustment live under advanced fine tuning.Reset terrain edits returns every pad, runway, and local sculpt to natural ground without deleting airport content.
The Terrain tool also has Contour lines- iso-height lines drawn over the surface the build will produce, with a heavier line every fifth. They are the quickest way to spot uneven ground while leveling: a leveled pad reads as a contour-free blank, crowded lines mean relief the leveling keeps, and the dense band around a pad's rim is its graded embankment. They work in the flat drafting view too, and the preference sticks.
Runways carry their own elevations because an airport can span real relief. Whether a runway's height changes the ground depends on the leveling: at 100% the field pad levels any strip it covers, so that runway follows the field; a strip outside the boundary gets its own level pad; and below 100% the strip curves with the land toward its own height. The runway panel says which of those applies, and Always keep this strip level on the runway forces a strip dead flat on its own pad at any leveling - for a level runway on an otherwise rolling field. The first land runway is marked as the primary anchor. Its height provides a stable airport datum for ground paint; adding or deleting a secondary runway no longer moves the whole field. Deleting the primary makes the next land runway the anchor.
Terrain workflow & simulator limits
Recommended order
- 1. Lay out the field. Place the main land runway first, then finish runway centres, the primary ground boundary, and detached ground areas. Moving any of these invalidates its old sample and requests fresh terrain automatically.
- 2. Verify elevations. Open Survey & exact height in the Terrain tool only when the automatic survey needs checking. Use Measure in MSFS when the companion is available and exact simulator height matters. Use a manual value only when you know the intended datum.
- 3. Establish the broad shape. New airports start with Level pad. Choose Follow ground to keep natural slopes or Smooth bumps for partial leveling. Existing airports keep their saved choice. Turn on contours and watch the cut/fill readout, especially on steep sites: a blank pad is level, crowded lines retain relief, and a dense rim is the graded transition.
- 4. Add exceptions. Decide which runways must stay level, which extra areas follow the airport or use their own pad, and where a Natural area should punch a hole through leveling.
- 5. Correct height, then sculpt. Use Height adjustment to move a whole field or area. Use separate Raise and Lower brushes, hardness, Smooth, Flatten, and exact point edits only after the broad pads are settled. Smooth redistributes a snapshot of the built surface and preserves its mean height, so it cannot grow a new hill.
- 6. Validate, save, build. Inspect in 3D, wait for the terrain preview to finish without a data warning, then save and build. A failed required grid is an explicit error; retry it rather than guessing what shipped.
Limits worth designing around
- Sculpting uses an approximately 10 m lattice, supports up to 6,000 changed points, and clamps every point to ±25 m. Very small features soften to that lattice; use point editing for fine offsets, not needle-sized terrain.
- Runway safety wins over sculpting. Forced-level runway strips are locked against the brushes, and overlapping terrain regions use a fixed priority instead of stacking unpredictably.
- A single MSFS airport record is not reliable for widely separated runway elevations. At a gap of at least 75 m and separation of at least 600 m, the builder offers a two-record split. Each cluster receives its own terrain footprint and sculpt points so one plateau cannot alter the other.
- Map terrain, survey terrain, and MSFS terrain are different data sets. The 3D preview shows the shape this build requests, but the simulator can still differ at a transition edge. Keep leveling boundaries and steep falloffs clear of critical objects, and use the companion sample for the field and runway datum.
- There is no useful universal maximum mountain slope: full leveling may move much more earth than a brush offset. Treat large cut/fill numbers and tightly overlapping pads as a warning to use partial leveling, a detached area, or a split rather than one enormous flat polygon.