
Building Your Airport6 min read
Taxiways & aprons
Runways get you on the ground; taxiways and aprons make the place feel like an airport. Taxiways are drawn point by point and snap themselves to what's already there; aprons are simple polygons you shape corner by corner.
Drawing taxiways
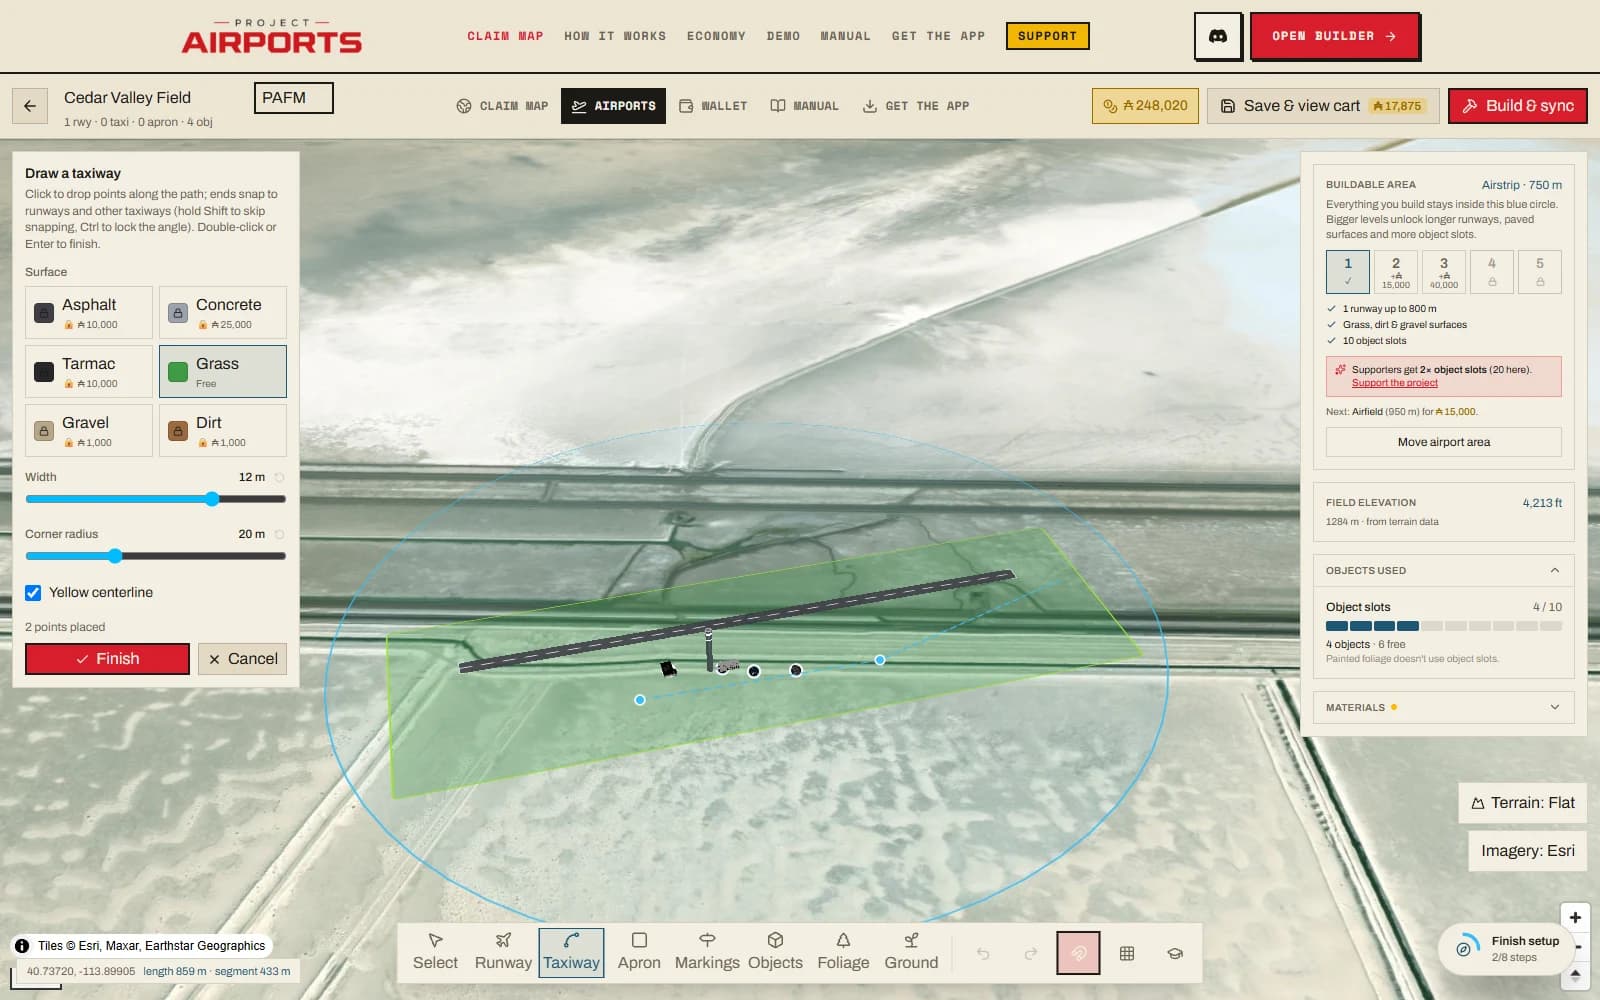
Press T to open the Taxiway tool, then click along your intended path to drop points. Ends snap to runways and to other taxiways, so connections line up without pixel-hunting - hold Shift to bypass the snap, or Ctrl to lock the segment angle. Finish with a double-click or Enter; a taxiway needs at least two points.
Editing taxiways
Select a placed taxiway and everything about it stays editable - no redrawing:
- Move a node - drag its round handle.
- Add a node - drag the hollow dot at the middle of any segment. It splits the segment and follows your cursor, so adding a curve to an existing taxiway is one gesture.
- Delete a node - Alt-click its handle.
- Move the whole taxiway - grab the pavement itself (not a handle) and drag. The shape translates rigidly, hold-shorts and all.
Aprons and fences edit the same way - hollow midpoint dots to add corners, Alt-click to remove, grab the body to move the whole thing. Reshaping is free as long as the total paved area doesn't grow (see Pricing).
Taxiway options
- Surface swatch - pick the pavement. Dirt and grass are the free tier; sealed surfaces need a material unlock.
- Width - slider from 4 to 30 m, default 12 m.
- Corner radius - slider from 0 to 60 m, default 20 m. This rounds every bend into a smooth fillet; set it to 0 for sharp corners.
- Yellow centerline - checkbox for the painted guide line.
- Lighting - blue edge lights and green centerline lights, priced per taxiway (see Airport lighting).
Saved pieces
Got a curve or a junction just right? Save it and stamp it again instead of redrawing it. In Select, click a taxiway - or Ctrl+drag a box / Ctrl+click to gather several into one piece - and press Save as piece. The section goes on the taxiway tray's Saved pieces shelf with its exact curves, surfaces, widths and lighting.
To use one: hit Place, click the map, and the piece lands as ordinary editable taxiways - already selected, so you can grab the pavement and slide the whole thing into position. Rename pieces right on the shelf; they're stored per browser, so they follow you to your next airport.
ATC designation
Every taxiway has an ATC designation field - a short name like A or B1. It does more than label the map: the designation drives the automatic hold-short sign labels, so a taxiway named A gets signs that read like the real thing. See Ground navigation for signs, hold-shorts, and the rest of the operational layer.
Aprons
Press A to open the Apron tool and pick a preset card - each combines a surface and a marking style. Then click each corner of the area you want to pave. Close the shape by clicking the first corner again, double-clicking, or pressing Enter; an apron needs at least three corners.
Editing aprons
Select an apron and drag its corner handles to reshape it. Drag a hollow midpoint dot to add a corner, Alt-click removes one, grab the surface to move the whole apron, and the surface swatch swaps the pavement, same as everywhere else.
Pricing
Pavement between runways is deliberately cheaper than the runways themselves: taxiway area costs 60% of the runway rate for the same surface, and apron area costs 40%. On the free tier you get 7,000 m² of grass taxiway and 9,000 m² of grass apron before anything hits the cart - details in Surface materials.